Summary
Our objective is the development of Standard Reference Materials (SRMs) and quantitative, reproducible, and accurate measurement methods for characterization of any structure possessing spatial order on the scale of X-ray wavelengths. Such SRMs and measurement methods will aid in the development of new crystalline materials and devices made from them. Therefore, the impact of this project includes pharmaceuticals, ceramics, metals, semiconductors, and polymers.
Description

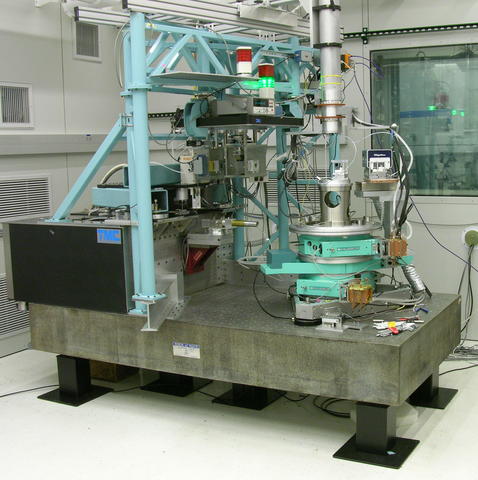
This is a view of the entire PBD sitting on its granite optical table. It is configured for double-crystal measurements of X-ray wavelengths.
Diffraction techniques can provide data on a number of sample characteristics. Therefore, the method of certification and the artifact itself are chosen to address a specific measurement issue pertinent to a diffraction experiment. NIST diffraction SRMs may be divided into five groups: Line Position, for calibration of the angle 2θ; Line Profile, for microstructure analysis; Instrument Response, for calibration of angle and intensity; Quantitative Analysis, for measurement of phase abundance; and Thin Film SRMs for measurement of thickness, surface roughness, and density of layered structures. The most common use of NIST SRMs is for calibration of diffraction line position. This requires that the SRM is certified with respect to lattice parameter. This length must be measured in a manner that is traceable to the International System of Units (SI) meter through a robust and transparent measurement chain. A major component of our effort consists of developing the capability for performing traceable measurement of lattice parameters for thin films and powders.
Impact and Customers
- Our primary impact is the enhancement of the measurement capability of the laboratory X-ray diffractometer; there are 20,000 in use worldwide.
- Two of the three major instrument vendors supply NIST Diffraction Metrology SRMs with the equipment they sell. One vendor includes SRM 1976 with every instrument and, as a result, has been able to improve their angular resolution three times over the previous value.
- Calibration of equipment with NIST Diffraction Metrology SRMs is requisite for ISO certification.
- Primary customers are the International Center for Diffraction Data (ICDD) and X-ray instrument vendors (BEDE, Bruker AXS, Jordan Valley, PANalytical, Rigaku and Technos).

